Batch Processing
For cases with many documents, you can attach and redact several files in one go.
When to Use Batch Processing
Batch processing is ideal when:
- A case has several documents requiring redaction
- You need to process similar document types
- You want consistent redaction across documents
For a very large set of files (a ZIP archive of up to 5 GB), Enterprise organisations can use Bulk ZIP Jobs.
Starting Batch Processing
Attach Multiple Documents
Batch processing isn’t a separate area — it happens whenever you attach more than one file. There is no “Start Batch Analysis” button.
- Open the case and start a case action that attaches documents (Request Info, Submit Info on an Awaiting Information case, or Close Case)
- In the file picker, select several files at once (hold Ctrl on Windows or Cmd on Mac)
- Check the summary of the files you chose and click Scan Files & Continue
- The redactable files are scanned and you are taken to the Review Detected PII screen, with one expandable panel per file
Document Selection Tips
- Attach documents of similar types together for more predictable results
- Review document quality before attaching
- Large batches may take several minutes
Batch Analysis
How It Works
- Text extraction - Files are read one after another. The screen shows “Extracting text from” and the file name, a progress bar and “Processing X of N files…”.
- Personal data check - Several files are then checked for personal data at the same time. The screen shows “Checking for personal data: X of N files”.
- When every file is done, the Review Detected PII screen opens.
Stay on the page while this runs.
Reviewing Batch Results
Per-Document Review
The Review Detected PII screen starts with a summary, for example “42 potentially sensitive entities detected across 6 files”. Each file has its own expandable panel. For each file you can:
- Expand the panel to see the detected entities and their type
- Toggle individual entities on or off for redaction
- Use Select All PII, Deselect Subject or Deselect All PII for that file
Every detected item starts selected, including the requester’s own details. Click Deselect Subject Data (or untick items) so the requester’s own information stays in their copy. A running count shows “x of y selected”, with the number of Subject and Third-Party items.
If a file could not be checked, an alert says so and the file is marked “Not checked” and excluded.
Bulk Selection Controls
Across the whole batch you can use:
- Select All (n) - select every detected entity for redaction
- Deselect Subject Data - clear entities identified as the data subject’s own information
- Smart Scan - after you deselect subject data, look for more of the requester’s details and likely false positives, and suggest deselecting them
- Deselect All - clear every selection
- Skip Redaction - attach the files without redacting them
To choose which files to include, use Select All Documents, Deselect All Documents, Select Only Healthy Files, Exclude Files with Many Entities and Exclude Files with No PII (n).
Items you rejected earlier on the same case start deselected. See AI-Powered Redaction for all the controls.
Batch Redaction
Redact Selected
- Make your selection using the per-entity toggles and the bulk controls above
- Click Redact Selected (n) to process all selected files
- Wait for processing to complete
Review and Confirm
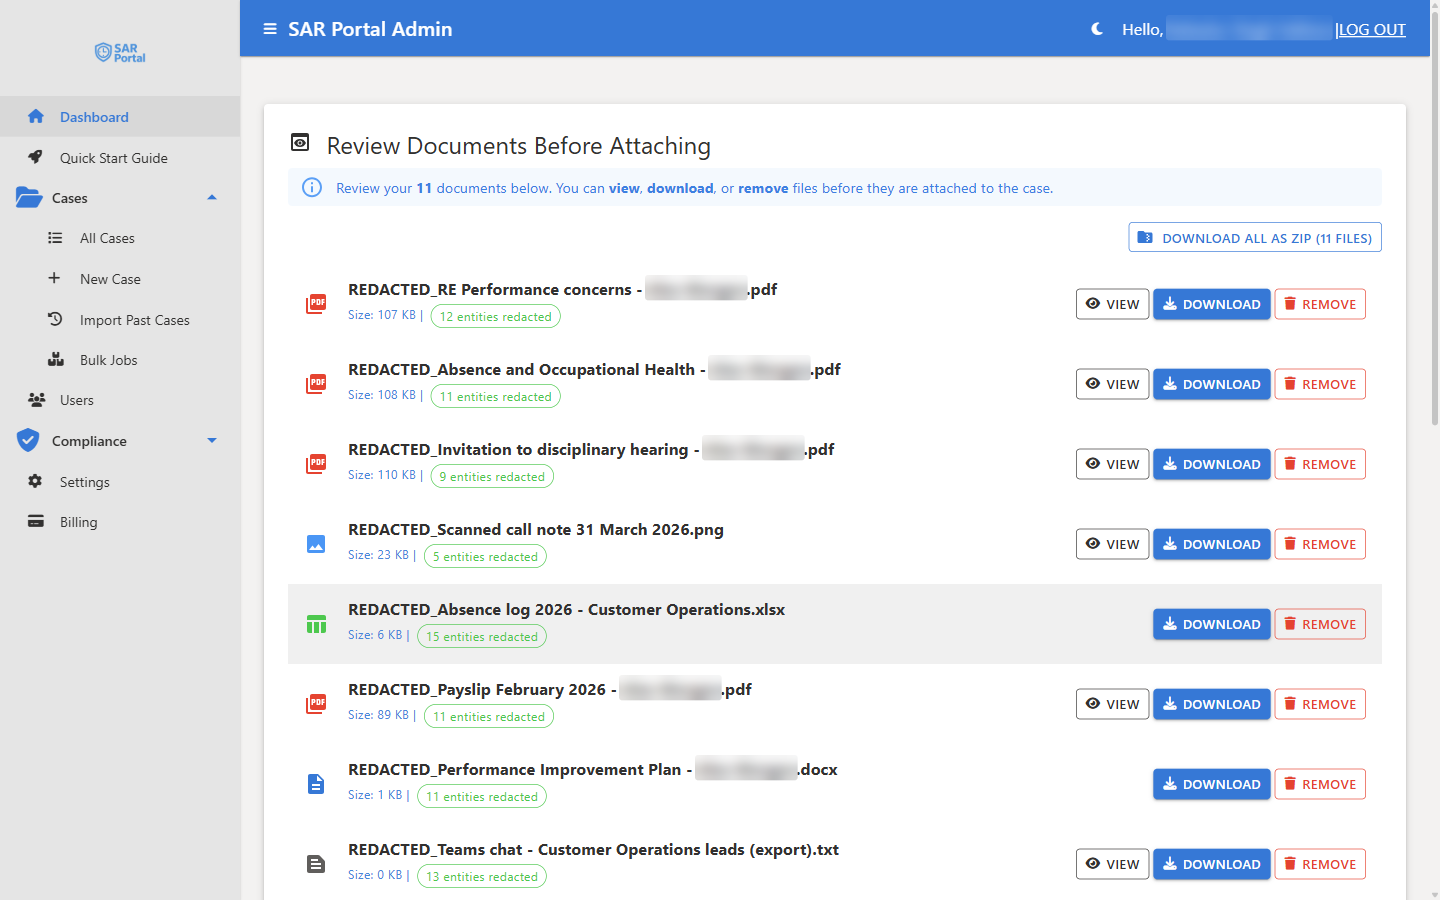
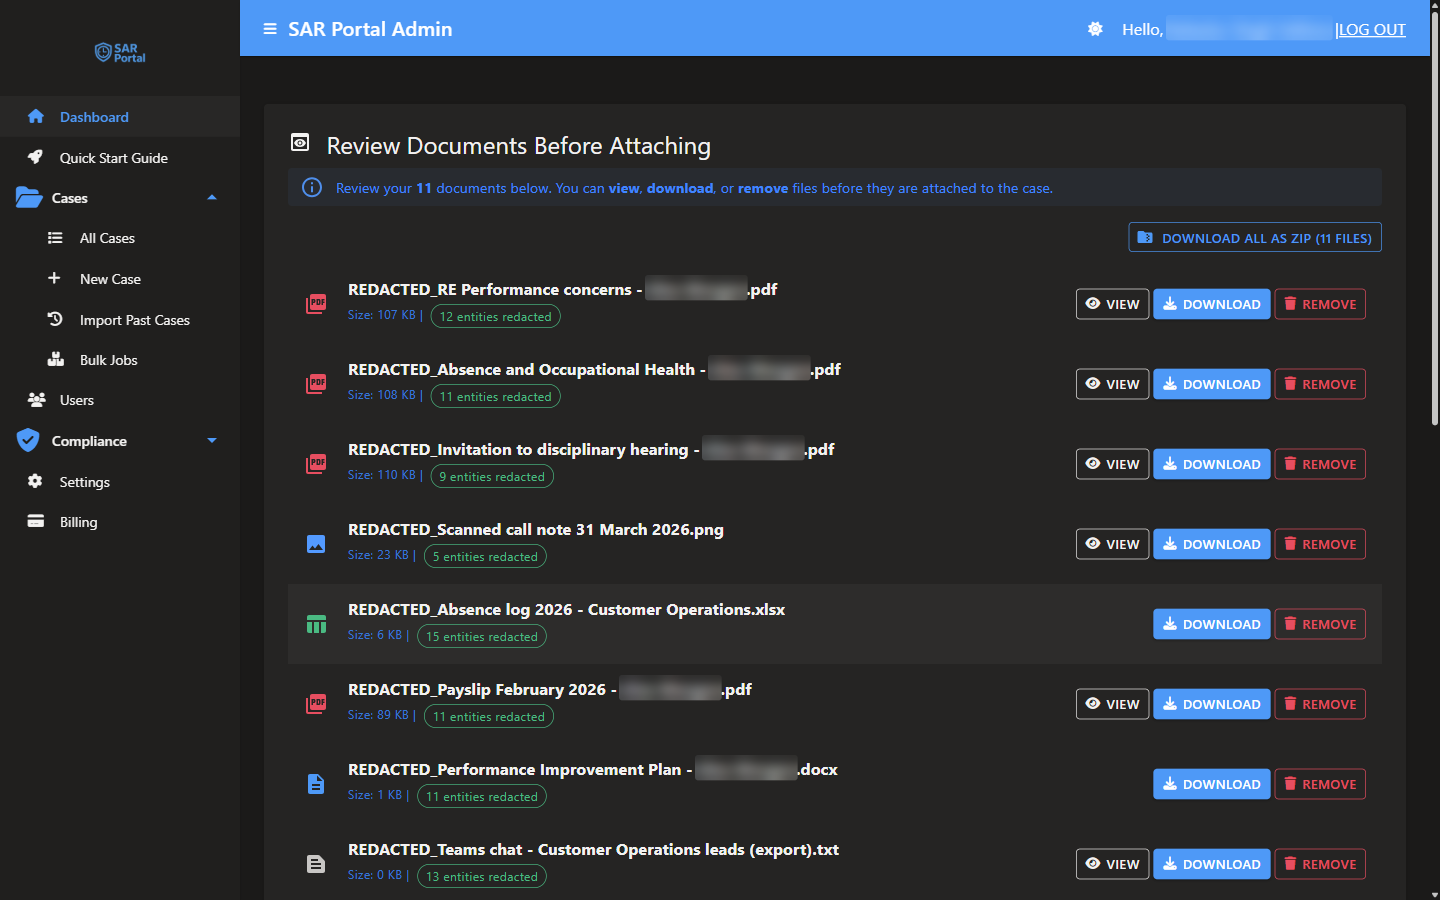
After processing, the Review Documents Before Attaching screen lets you check each redacted file before it is attached:
- View - open a file to check what was removed. PDFs and single-frame images open in an editor where you can add redactions by hand
- Download - save a copy of the redacted output
- Remove - drop a file from the batch
- Download All as ZIP (n files) - save every file at once
You can also:
- Click Add More Files to add another set of files to the same batch
- Click Pause & Resume Later to continue the review another time
When you’re satisfied, click Confirm & Attach to Case (n) to add the redacted files to the case.
Held Back Files
Files that are not safe to attach as they are appear under Held back — not included (n). They are not attached, downloaded or saved. The reason is shown on each file:
| Reason | What it means |
|---|---|
| Not checked for personal data | The personal data check could not run on this file |
| Redaction failed — personal data not removed | The selected items could not be redacted |
| Personal data still visible after redaction | Some selected items were still found after redaction |
Each held-back file has Include anyway and Remove. Include a file only if you will redact it yourself before sharing. See Upload Options.
Pausing and Resuming
Pause & Resume Later saves the review, including any files you added. The case page then shows a Paused Redaction Workspace banner listing the files. Click Resume to carry on, or Discard to drop the paused files. The files are not attached to the case until you resume and confirm.
Performance Considerations
Document Limits
| Aspect | Limit |
|---|---|
| Total batch size | 250 MB (Trial, Basic), 500 MB (Starter), 1 GB (Pro, Enterprise) |
| Max document size | 100 MB (10 MB on trial) |
| Files per case on a trial | 10 |
Every page processed counts toward your plan’s page allowance. See AI-Powered Redaction.
Processing Time
Processing time varies with document length, scan quality and load. Long emails and large spreadsheets can take several minutes.
Optimizing Batch Performance
- Group similar documents - Similar types process more predictably
- Smaller batches for urgent work - Start with priority documents, then use Add More Files
- Re-upload failures separately - Remove a held-back file and attach it again in a new batch rather than re-running the whole batch
Best Practices
Before Starting
- Review documents to ensure they need processing
- Remove duplicates from the batch
- Ensure documents meet quality requirements
During Processing
- Don’t close the browser during batch operations
- Use Pause & Resume Later if you need to stop part-way through the review
After Completion
- Review all detections before applying redactions
- Check edge cases manually
- Verify redacted outputs before sending
Quality Control
- Spot-check a sample of redacted documents
- Verify critical documents individually
- Record any redactions you added by hand in the case notes
Error Handling
Common Problems
File marked “Not checked”
- The file could not be read or checked, for example because the page allowance is used up
- Try again later, or include it only if you will redact it yourself
“Redaction failed — personal data not removed”
- The file may be corrupted, password protected or an unusual format variant
- Remove it, fix the file and attach it again
“Personal data still visible after redaction”
- Some selected items were still found after redaction
- Click Include anyway, then View to add redactions by hand (PDFs and images), or remove it and redact it outside SAR Portal
Audit Trail
Attaching documents to a case is recorded in the audit trail, with who attached them and when.